Back up Database in SQLServer 2008
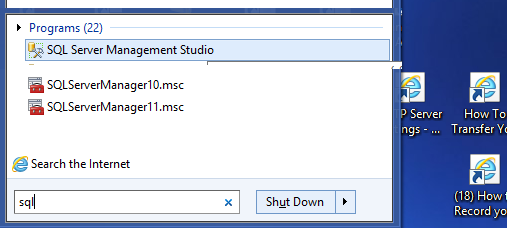
1. Open SQL Server Management Studio Express and connect to the SQL server.
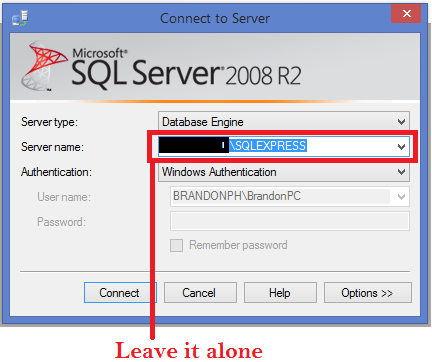
Click Connect
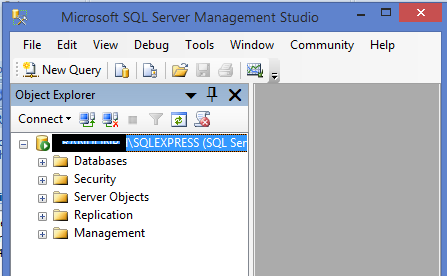
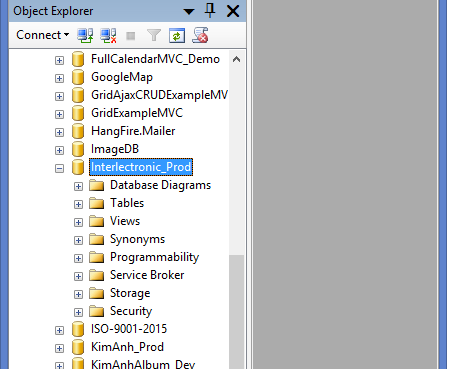
2. Expand Databases.
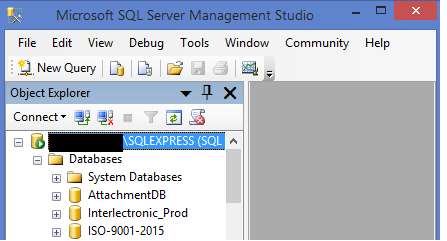
Click Interlectronic_Prod
Expand it
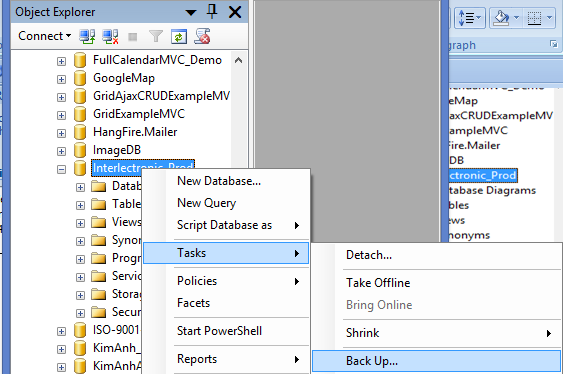
3. Right-click on the database you want to back up, then select Tasks > Back up. (This is not avalbile for version 2018/2019)
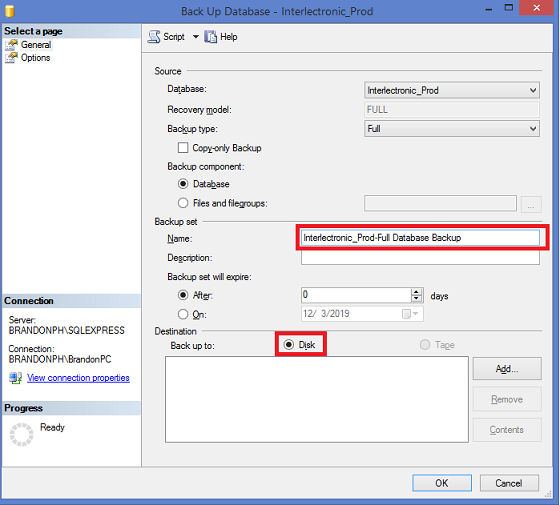
4. On the Back Up Database window, make sure the Database field contains the name of the database you want to back up.
Change the Name to Interlectronic_Prod-Full Database Backup to Interlectronic_Prod
Select Disk
Click Add button
5. Select the Backup Type. By default, it is Full - leave it set to that.

6. Click Remove to remove the default/last backup file name.
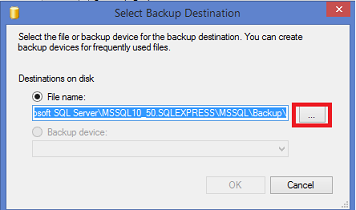
7. Click Add to open the Select Backup Destination window.
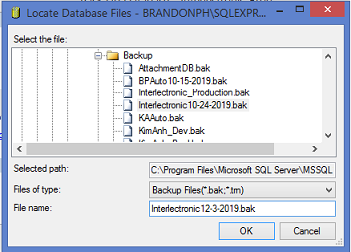
8. Click [...] next to the File Name field.
9. On the Locate Database Files window, select the folder where you want to backup file to go. By default, it is ..\Microsoft SQL Server\MSSQL.1\MSSQL\Backup.
10. In the File Name field, type the name for this backup, with a .bak extension. File Name should be Interlectronic12-3-2019.bak.
11. Click OK to close the Locate Database Files window.
12. Click OK to close the Select Backup Destination window.
13. Click OK to start the backup. The progress icon displays in the lower left corner, and a ‘completed successfully’ message displays when its done.
To Locate backup file and zip it
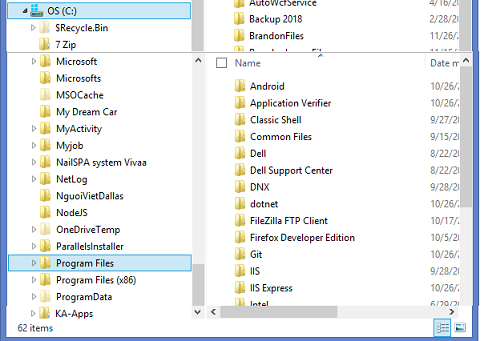
1. Open window exloyer
2. Click and expand Program Files
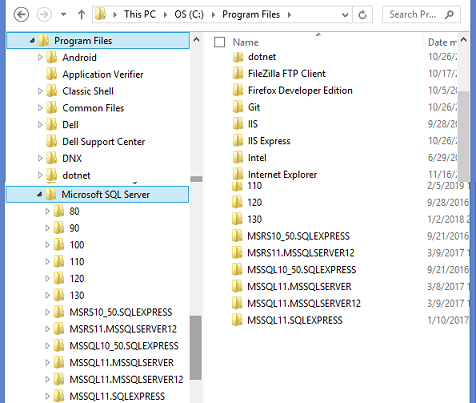
3. Click to expand Microsoft SQLServer
Click and spand one of the folder MSSQL....
END
Click Connect
2. Expand Databases.
Click Interlectronic_Prod
Expand it
3. Right-click on the database you want to back up, then select Tasks > Back up. (This is not avalbile for version 2018/2019)
4. On the Back Up Database window, make sure the Database field contains the name of the database you want to back up.
Change the Name to Interlectronic_Prod-Full Database Backup to Interlectronic_Prod
Select Disk
Click Add button
5. Select the Backup Type. By default, it is Full - leave it set to that.
6. Click Remove to remove the default/last backup file name.
7. Click Add to open the Select Backup Destination window.
8. Click [...] next to the File Name field.
9. On the Locate Database Files window, select the folder where you want to backup file to go. By default, it is ..\Microsoft SQL Server\MSSQL.1\MSSQL\Backup.
10. In the File Name field, type the name for this backup, with a .bak extension. File Name should be Interlectronic12-3-2019.bak.
11. Click OK to close the Locate Database Files window.
12. Click OK to close the Select Backup Destination window.
13. Click OK to start the backup. The progress icon displays in the lower left corner, and a ‘completed successfully’ message displays when its done.
To Locate backup file and zip it
1. Open window exloyer
2. Click and expand Program Files
3. Click to expand Microsoft SQLServer
Click and spand one of the folder MSSQL....
END
No results found